Self Hosted WireGuard VPN on OpenBSD
We’re at a time where we’re reminded by Edward Snowden (Twitter link) himself, that large corporations hosting VPNs should not be trusted.
If you're an ExpressVPN customer, you shouldn't be. https://t.co/l8us92W0BQ
— Edward Snowden (@Snowden) September 16, 2021
For traveling and some form of privacy enhancements we are however in need for VPN solutions. Given trust in big tech is at an all time low, I’m looking to setup my own VPN using a recent open source solution WireGuard on Vultr.

WireGuard is a project by Jason Donenfeld (Twitter link). It was designed with the goals of ease of use, simplicity and modern cryptography. A counterweight to OpenVPN and IPsec. The spec is meant to be easy to implement in very few lines of code, allowing auditability for security vulnerabilities and the claim of having “a minimal attack surface”. Contrary to common solutions, it passes traffic only over UDP.
WireGuard was incorporated into the Linux 5.6 kernel and released in March 2020. As we all know, there is no greater honor for software engineers to receive the praise of Linus Torvalds. Linus called the implementation “work of art compared to OpenVPN and IPSec” on the mailing list:
Can I just once again state my love for it and hope it gets merged soon? Maybe the code isn’t perfect, but I’ve skimmed it, and compared to the horrors that are OpenVPN and IPSec, it’s a work of art.
The second operating system after Linux with integrated WireGuard support, and my personal favorite for servers, was OpenBSD. Matt Dunwoodie’s implementation for OpenBSD, written in C landed in OpenBSD 6.8, October 2020 and was announced on the OpenBSD mailing list by Jason A. Donenfeld himself:
I should also note that the upstreaming process to OpenBSD was extremely pleasant. We did three patch revisions, with useful feedback on each one and a very supportive community.
The OpenBSD code is distributed under a free ISC license. We can consider this solution one of the safest and easiest to use VPNs available to us.
Setting up WireGuard on OpenBSD
Vultr VPS OpenBSD Setup
We create a $5 VPS on Vultr in either Germany or Japan, both countries with a high internet freedom index. The setup here is similar to what I noted down earlier on a OpenBSD base configuration. Create a user and add the public keys for ssh that Vultr added to our root user:
adduser
cp .ssh/authorized_keys /home/<user>/.ssh/
Allow doas for our new user
vi /etc/doas.conf
permit persist :wheel
usermod -G wheel <user>
And disallow root to ssh into the box
vi /etc/ssh/sshd_config
PermitRootLogin no
PasswordAuthentication no
Install updates and reboot
syspatch
reboot
We can now begin the VPN setup.
Setting up a WireGuard VPN Server
Install WireGuard tools
doas pkg_add wireguard-tools
Enable IP and IPv6 forwarding to allow packets to move between the WireGuard interface and the egress interface.
doas sysctl net.inet.ip.forwarding=1
doas sysctl net.inet6.ip6.forwarding=1
And ensure it persists a reboot
doas vi /etc/sysctl.conf
sysctl net.inet.ip.forwarding=1
sysctl net.inet6.ip6.forwarding=1
Create the WireGuard keys
doas mkdir /etc/wireguard
doas chmod 700 /etc/wireguard
doas su     # become root
cd /etc/wireguard
wg genkey > secret.key
chmod 600 secret.key
wg pubkey < secret.key > public.key
While being located in /etc/wireguard, create the file vi /etc/wireguard/wg0.conf with these contents:
[Interface]
PrivateKey = <SERVER PRIVKEY>
ListenPort = 51820

# iOS / Android smartphone
[Peer]
PublicKey = <CLIENT PUBKEY>
AllowedIPs = 10.0.0.2/32
Navigate with vi to the private key and use the :r private.key shortcut to paste the contents
into the right place. Each peer is assigned a key pair (a public and private key) and an internal
IP address. The outgoing traffic from a client is encrypted with the servers public key and
enveloped in UDP. We use the 10.0.0.0/24 subnet for the VPN. The IP 10.0.0.1 will be the server
through which traffic is tunneled.
Create vi /etc/hostname.wg0 with the following contents:
inet 10.0.0.1 255.255.255.0 NONE
up

!/usr/local/bin/wg setconf wg0 /etc/wireguard/wg0.conf
Next we configure the firewall pf and allow connections from clients. We open the port 51820 on
which WireGuard will listen. Configure pf with vi /etc/pf.conf. Note that ifconfig shows our
network device is vio0 but yours might be different:
pass in on wg0
pass in inet proto udp from any to any port 51820
pass out on egress inet from (wg0:network) nat-to (vio0:0)
That’s it. Optionally assign a A and AAAA DNS record from a domain you’re owning for quick access.
How to add an iPhone or Android as a WireGuard Client?
Install WireGuard on your iOS or Android phone
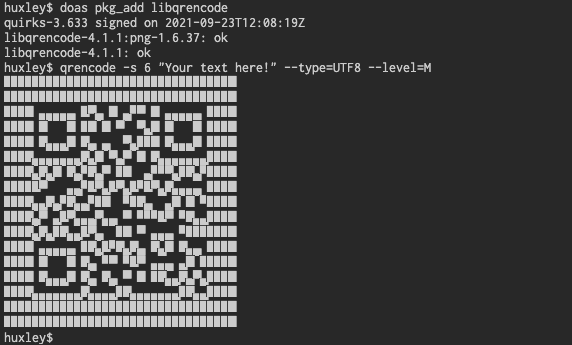
We can generate QR codes on terminals with the utility qrencode. Install and test it with
doas pkg_add libqrencode
qrencode -s 6 "Your text here!" --type=UTF8 --level=M
Now create the client config:
umask 077 && wg genkey > wg-private-client.key
wg pubkey < wg-private-client.key > wg-public-client.key
Print the client pubkey and add it to the server config to the peer section in /etc/wireguard/wg0.conf from above.
cat wg-public-client.key
Then reboot the server or run
doas sh /etc/netstart wg0
doas pfctl -f /etc/pf.conf
We’re done with the WireGuard server (for one client configured).
We can check if the port is open with netcat nc -zv -u <IP or FQDN> 51820.
Print the client private key for our client config:
cat wg-private-client.key
Create ~/wg-client.conf with the following content:
[Interface]
PrivateKey = <CLIENT PRIVKEY>
Address=10.0.0.2/32
DNS = 9.9.9.9

# Server
[Peer]
PublicKey = <SERVER PUBKEY>
Endpoint = <IP or FQDN>:51820
AllowedIPs = ::/0, 0.0.0.0/0
PersistentKeepalive = 25
The first client will be assigned 10.0.0.2, if we add more peers we just increment this number. AllowedIPs 0.0.0.0/0 and ::/0 mean all IP addresses in IPv4 and IPv6 will use the WireGuard tunnel.
Print the QR code for the config above and scan it with your smartphone for importing the config:
qrencode --read-from=wg-client.conf --type=UTF8 --level=M
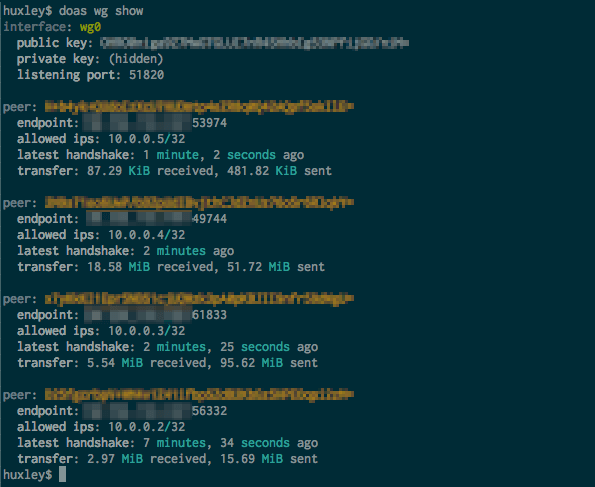
Show the status of connected peers
doas wg show wg0
We’re done.
How to add Ubuntu Linux as a WireGuard Client?
I’m running Ubuntu Server on my Raspberry Pi and want it to enjoy the same privacy considerations as my other clients.
Install WireGuard and resolvconf on the Ubuntu client machine:
sudo apt-get install wireguard resolvconf
Follow the key creation and create a client config, see that I incremented the interface address to 3 here.
[Interface]
PrivateKey = <CLIENT PRIVKEY>
Address=10.0.0.3/32
DNS = 9.9.9.9

# Server
[Peer]
PublicKey = <SERVER PUBKEY>
Endpoint = <IP or FQDN>:51820
AllowedIPs = ::/0, 0.0.0.0/0
PersistentKeepalive = 25
Copy the config in place on the Ubuntu client /etc/wireguard/wg0.conf. And test the configuration with
systemctl start wg-quick@wg0
curl ifconfig.me
We expect the IP of the VPN server to be shown. If this works, enable WireGuard to run on reboot
sudo systemctl enable wg-quick@wg0
Voilà!
Summary: adding clients and showing connected clients
See a snippet on how to add any client configuration to a WireGuard server.
On the server, we can show the connected clients and the bandwidth of each with the show command:
doas wg show
Enjoy your private and secure VPN!
Published on Sunday, Sep 26, 2021. Last modified on Saturday, Jun 18, 2022.
Go back