Solana on the Raspberry Pi and VPSs
The Solana test validator is convenient to develop on, since it has the following advantages before hitting devnet/testnet with dApps.
- easy to monitor
msg!()logs from on-chain programs - no RPC rate-limits
- no airdrop limits
- load accounts from files
- …
In shared dev environments where we separate frontend and backend (on-chain) work we ran into situations where it would be nice to connect and test on a shared test ledger. Beyond unit tests on local validators, an environment for quick integration tests without the need to sync each others work stations is neat and supports the paradigm of a single shared data store, that isn’t really common in modern SOA software development. The Raspberry Pi is ideal and portable for this setup.
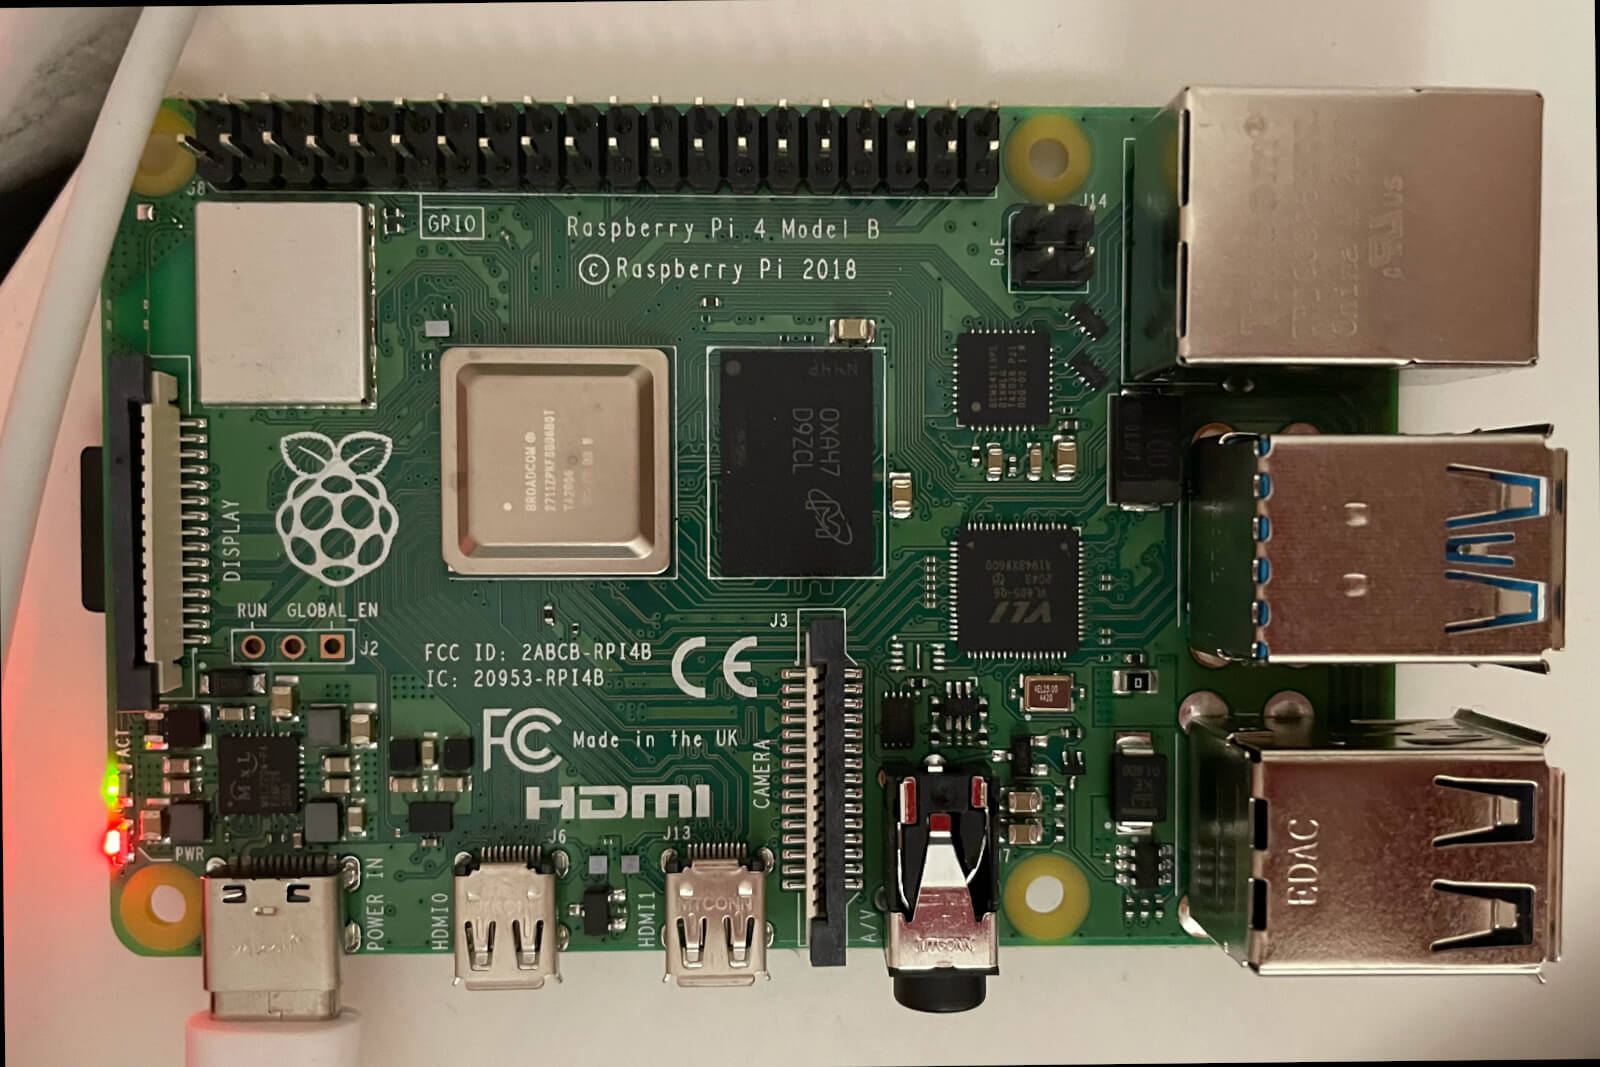
I’m using a Raspberry Pi 4 Model B (ARM Cortex-A72 ARMv8 64bit) with 8GB of RAM in the following, but the steps should only depend on Ubuntu and work with other hardware as well.
Solana on Ubuntu Server
Ubuntu is a popular and widely supported Linux distribution. I’d choose it for general purpose Raspberry Pi installations that need to be usable by normi hipster IT folks. I will use it as the basis of the instructions in this post for wide applicability. This will work just as well on a Vultr VPS.
We’re of course no fan of piping scripts from the internet via curl to a shell and I’m going to install things the proper way.
Install Dev Dependencies and Rust
Install rust, via rustup via snap via apt-get:
sudo apt-get install -y snapd pkg-config build-essential libudev-dev libclang-dev libssl-dev zlib1g-dev
sudo snap install rustup --classic
rustup component add rustfmt
Install Solana from Source on the Raspberry Pi
Install solana from
solana-labs/solana@latest.
At the time of writing I get the package @1.9.2 but it may differ for you.
wget https://github.com/solana-labs/solana/archive/refs/tags/v1.9.2.tar.gz
tar xzf v1.9.2.tar.gz
cd solana-v1.9.2/
./scripts/cargo-install-all.sh .
export PATH=$PWD/bin:$PATH
solana --version
solana-cli 1.9.2 (src:devbuild; feat:4100269022)
if this works add the solana bin directory to your path by default:
echo "export PATH=$PWD/bin:\$PATH" >> ~/.bashrc
NOTE: If you’re compiling Solana on Vultr, Digital Ocean or Linode VPSs you *will need at least 4GB of RAM. With a 1GB machine you will run into compile *time errors such as this one I encountered myself:
error: could not compile `libsecp256k1`

Caused by:
  process didn't exit successfully: `rustc --crate-name libsecp256k1 --edition=2018 /root/.cargo/registry/src/github.com-1ecc6299db9ec823/libsecp256k1-0.6.0/src/lib.rs --error-format=json --json=diagnostic-rendered-ansi,artifacts --crate-type lib --emit=dep-info,metadata,link -C opt-level=3 -C embed-bitcode=no --cfg 'feature="default"' --cfg 'feature="hmac"' --cfg 'feature="hmac-drbg"' --cfg 'feature="sha2"' --cfg 'feature="static-context"' --cfg 'feature="std"' --cfg 'feature="typenum"' -C metadata=ee27440a3946853b -C extra-filename=-ee27440a3946853b --out-dir /root/solana-1.9.10/target/release/deps -L dependency=/root/solana-1.9.10/target/release/deps --extern arrayref=/root/solana-1.9.10/target/release/deps/libarrayref-ee1f5e5cb538f6d3.rmeta --extern base64=/root/solana-1.9.10/target/release/deps/libbase64-61ff7f70cf1b36b4.rmeta --extern digest=/root/solana-1.9.10/target/release/deps/libdigest-fb177bf38edca269.rmeta --extern hmac_drbg=/root/solana-1.9.10/target/release/deps/libhmac_drbg-34caf16e695357dc.rmeta --extern libsecp256k1_core=/root/solana-1.9.10/target/release/deps/liblibsecp256k1_core-5bcfe5db170b9021.rmeta --extern rand=/root/solana-1.9.10/target/release/deps/librand-8596ccae0b5ffafe.rmeta --extern serde=/root/solana-1.9.10/target/release/deps/libserde-f099ce955301f0ae.rmeta --extern sha2=/root/solana-1.9.10/target/release/deps/libsha2-76c40ab06078d839.rmeta --extern typenum=/root/solana-1.9.10/target/release/deps/libtypenum-8f37907d38043bf5.rmeta --cap-lints allow` (signal: 9, SIGKILL: kill)

warning: build failed, waiting for other jobs to finish...
The following warnings were emitted during compilation:

warning: c++: fatal error: Killed signal terminated program cc1plus
warning: compilation terminated.

error: build failed
Add a simple Firewall to our setup
If you bring this setup around, it may be recommended to set up basic firewall rules as we only really need to expose the 8899 JSON RPC and 8900 socket port next to ssh and web.
sudo apt-get install ufw
sudo ufw allow ssh
sudo ufw allow 8899/tcp
sudo ufw allow 8900/tcp
sudo ufw enable
Status: active

To                         Action      From
--                         ------      ----
22/tcp                     ALLOW       Anywhere
8899/tcp                   ALLOW       Anywhere
22/tcp (v6)                ALLOW       Anywhere (v6)
8899/tcp (v6)              ALLOW       Anywhere (v6)
Systemd service file for the Solana Validator
Unlike my other posts where we create OpenRC scripts on OpenBSD, most Linux distributions use systemd as init and service manager in 2021. [screeching noise in the background]. The KISS people lost the holy war on init systems. Redhat pushed for it and made it a requirement for one of the most popular desktop environments, Gnome 3. But I digress.
We will create a systemd service file that will allow us to control the Solana test validator service using the systemctl command and auto start it at boot with the Ubuntu server.
Find and copy the test validator binary to /usr/loca/bin
which solana-test-validator
/home/ubuntu/solana-1.9.2/bin/solana-test-validator
sudo cp /home/ubuntu/solana-1.9.2/bin/solana-test-validator /usr/local/bin/
Create the systemd service file
sudo touch /etc/systemd/system/solana-test-validator.service
sudo chmod 664 /etc/systemd/system/solana-test-validator.service
sudo mkdir -p /var/db/solana/test-ledger
[Unit]
Description=Solana Test Validator

[Service]
Restart=always
ExecStart=/usr/local/bin/solana-test-validator -q --ledger /var/db/solana/test-ledger

[Install]
WantedBy=multi-user.target
after edit, reload systemd configuration
sudo systemctl daemon-reload
now we should be able to start the service and get service logs
# start/stop/restart the daemon
sudo systemctl start solana-test-validator
# daemon status
systemctl status solana-test-validator
# daemon logs
journalctl -u solana-test-validator
-- Journal begins at Wed 2021-10-13 13:32:52 UTC, ends at Thu 2021-12-30 03:07:30 UTC. --
Dec 30 03:06:08 ubuntu systemd[1]: Started Solana Test Validator.
Dec 30 03:06:08 ubuntu solana-test-validator[2962]: Notice! No wallet available. `solana airdrop` localnet SOL after creating one
Dec 30 03:06:08 ubuntu solana-test-validator[2962]: Ledger location: test-ledger
Dec 30 03:06:08 ubuntu solana-test-validator[2962]: Log: test-ledger/validator.log
Dec 30 03:06:08 ubuntu solana-test-validator[2962]: Initializing...
Dec 30 03:06:15 ubuntu solana-test-validator[2962]: Waiting for fees to stabilize 1...
Dec 30 03:06:15 ubuntu solana-test-validator[2962]: Connecting...
Dec 30 03:06:15 ubuntu solana-test-validator[2962]: Identity: FMvWE59pQ22TLBgLhprRLZu8TJZnmDnekFJduqALE3g3
Dec 30 03:06:15 ubuntu solana-test-validator[2962]: Genesis Hash: CWynMUHN1rVvmRGzzdC8KvfLmTQJRMogt53VE38nFcza
Dec 30 03:06:15 ubuntu solana-test-validator[2962]: Version: 1.9.2
Dec 30 03:06:15 ubuntu solana-test-validator[2962]: Shred Version: 62322
Dec 30 03:06:15 ubuntu solana-test-validator[2962]: Gossip Address: 127.0.0.1:1024
Dec 30 03:06:15 ubuntu solana-test-validator[2962]: TPU Address: 127.0.0.1:1027
Dec 30 03:06:15 ubuntu solana-test-validator[2962]: JSON RPC URL: http://127.0.0.1:8899
...
and finally auto start the daemon with the system
sudo systemctl enable solana-test-validator
Connect a Wallet to the Local Validator Node
In the web3 world, we connect browser extension wallets to blockchain network nodes. The extension injects Javascript into pages and allows to connect our wallet to the client dApps. A good browser extension wallet to test during Solana dApp development with a custom cluster URL is Sollet. It has its quirks but I found nothin easier to set up so far.
Connect the Sollet Browser Extension to the Solana Validator
Sollet is supported by the solana-labs/wallet-adapter. The version in the chrome app store doesn’t currently support custom endpoints at the time of writing, it is however supported by the extension source, so I ended up compiling it myself.
Note that if we want to build this on our Ubuntu machine, we have to add NodeJS, npm and yarn.
sudo apt-get install -y nodejs npm zip
npm install -g yarn
On most dev machines it will then be
git clone https://github.com/project-serum/spl-token-wallet.git
cd spl-token-wallet
yarn install
yarn build:extension
Unzip it, go to chrome://extensions/ and enable “Developer mode”. Then select
“Load unpacked” and load the ./build directory.
From the extension, add a new custom endpoint with the IP address of the Raspberry Pi in your local area network, e.g.
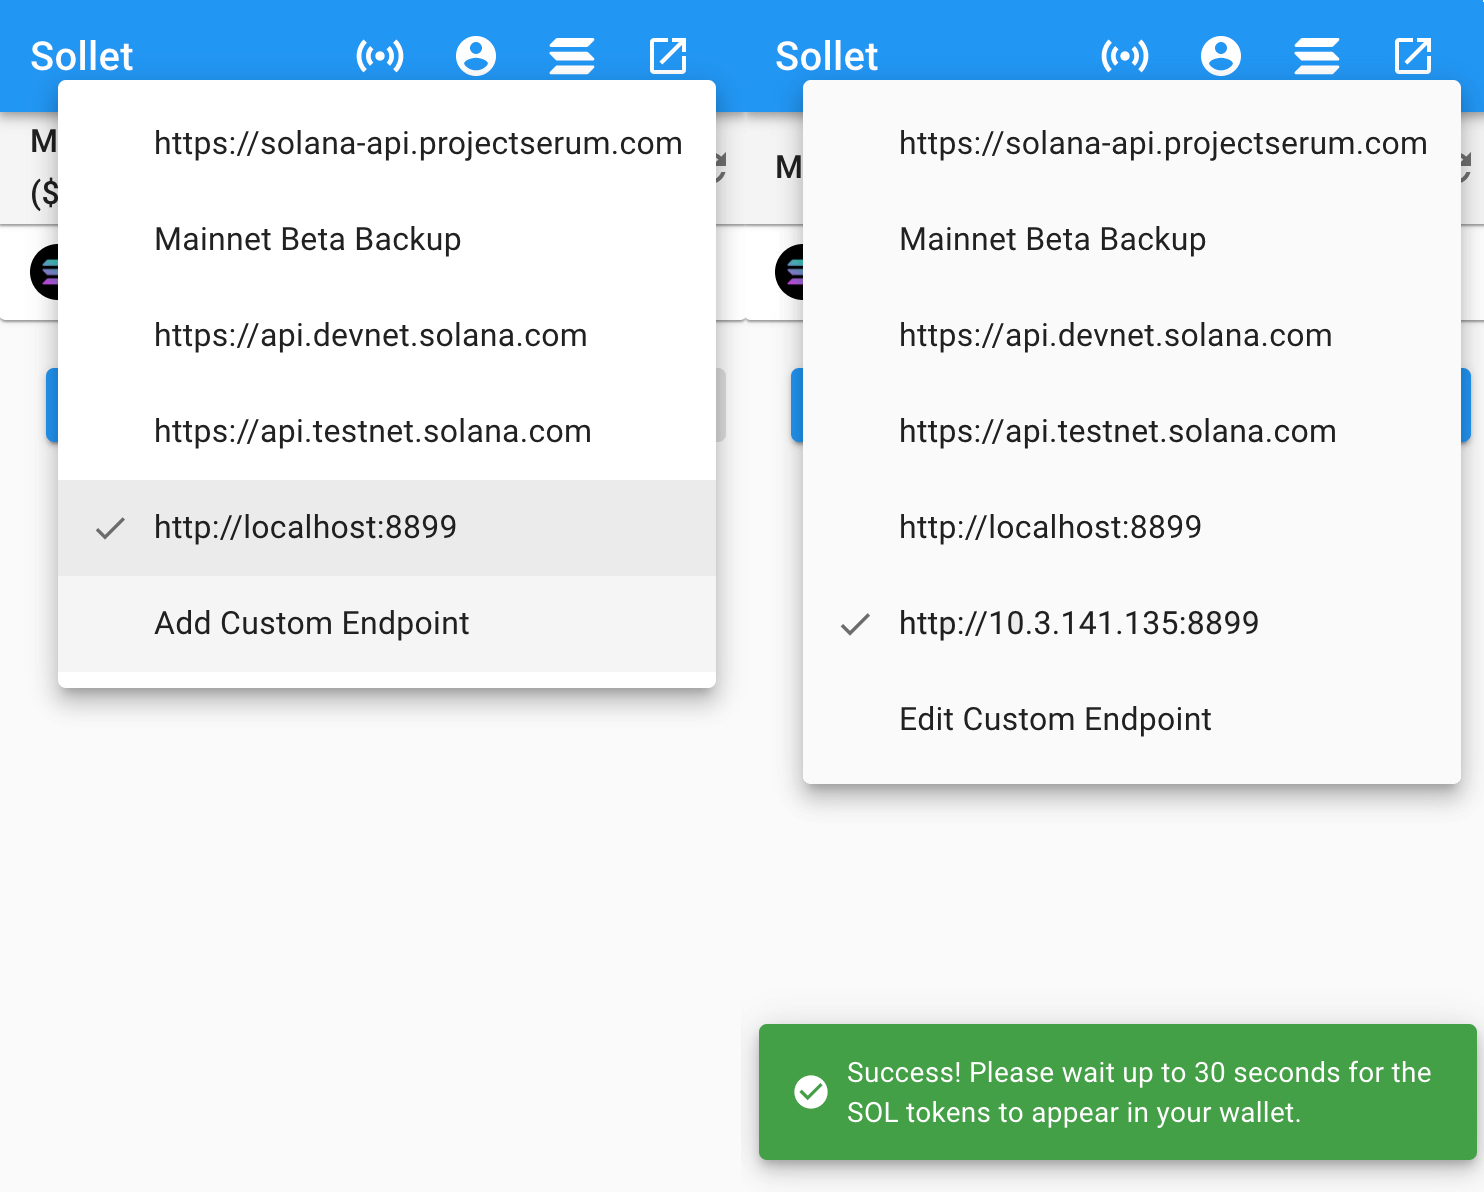
Request airdrop should work after connection as seen in the right hand screenshot. Boom! The majority of the setup is done, the team can develop frontend and backend together now and in parallel.
Debugging
If you have the solana toolchain installed, you can remotely trail logs now:
solana logs --url http://10.3.141.135:8899
e.g. from an airdrop request from the sollet chrome browser extesion we should see something like this:
Streaming transaction logs. Confirmed commitment
Transaction executed in slot 243:
  Signature: 4wygVivwi9soFSYVMwnLEL285UPZzr6B5eu72aYLEks1jTsUkCVzRmJUAQVjbn6qj8K4Mqj9w3C9ZbtLeuu4wQF2
  Status: Ok
  Log Messages:
    Program 11111111111111111111111111111111 invoke [1]
    Program 11111111111111111111111111111111 success
Development & Workarounds
We just need to configure our local dev environment to our networked node:
solana config set --url http://10.3.141.135:8800 --ws ws://10.3.141.135:8900
solana airdrop 10
Anchor
Anchor is a Solana framework providing several convenient dev tools. Such as Rust crates and eDSL for programs, IDL specification generation and TypeScript package for generating clients from IDL. We build Anchor from source:
cargo install --git https://github.com/project-serum/anchor --tag v0.19.0 anchor-cli --locked
After anchor build we get the program ID or can generate it from scratch with
solana-keygen new -o target/deploy/rpi_test-keypair.json
Update the source and deploy it.
OUTDATED: This often fails with a timeout, as was reported in an Apple M1 Github issue. I’m using the inverse architecture setup here, dev toolchain on x86_64 and deployment to ARM. The deployment constantly resends transactions and errors like this:
Blockhash expired. 5 retries remaining
Blockhash expired. 4 retries remaining
Blockhash expired. 3 retries remaining
Blockhash expired. 2 retries remaining
Blockhash expired. 1 retries remaining
Error: Data writes to account failed: Custom error: Max retries exceeded
I didn’t investigate a lot yet as a viable workaround is a simple deploy script that scp’s the shared object and key for the program id (this is just a test env) and subsequently deploys it from the local ARM environment.
# copy the shared object
scp ./target/deploy/* ubuntu@10.3.141.135:~
# execute solana program deploy
ssh ubuntu@10.3.141.135 ./solana-1.9.2/bin/solana program deploy --program-id ./solana_raspberry_pi_test-keypair.json ./solana_raspberry_pi_test.so
UPDATE: like devnet, deployments especially of larger programs often fail and require retries. Depending on the size of your BPF binary blob you maybe need several attempts. The toolchain currently requires you to retry manually. This wasn’t an issue related to architecture as far as I’m aware of.
Setup new Anchor project against the RPI test validator
Create a new project as usual
anchor init solana-raspberry-pi-test
Edit the Anchor.toml file and point it to our node on the network
[provider]
cluster = "http://10.3.141.135:8899"
wallet = "/Users/noxim/.config/solana/id.json"
As mentioned above, Solana deploy currently doesn’t finalize and subsequently
anchor deploy will not neither. We can add the above workaround to an anchor
script in Anchor.toml however to retain convenience:
[scripts]
test = "yarn run ts-mocha -p ./tsconfig.json -t 1000000 tests/**/*.ts"
deploy ="scp ./target/deploy/* ubuntu@10.3.141.135:~ && ssh ubuntu@10.3.141.135 ./solana-1.9.2/bin/solana program deploy --program-id ./solana_raspberry_pi_test-keypair.json ./solana_raspberry_pi_test.so"
Instead of anchor deploy we then run anchor run deploy. The test convenience
target will run into similar issues which we can also work around with an
anchor run test script analogously if we want to not run build, deploy and
tests separately.
In the test switch out the provider to be the remote Solana node:
  // Configure the client to use the remote cluster.
  // from
  // anchor.setProvider(anchor.Provider.env());
  // to, e.g.
  anchor.setProvider(anchor.Provider.local("http://10.3.141.135:8899"));
Another annoyance is that the workspace management doesn’t work for custom
clusters with Anchor. Since we cannot specify one of the hardcoded clusters, our
program ID doesn’t end up in the IDL and therefore tests will not natively work.
If we regenerate the IDL (any run of anchor build will do so), we will have to
manually copy the program ID into the bottom of the IDL. E.g.
{
  // ...
  "metadata": {
    "address": "7abScw4KgUtHGVqCRNDKFRXMo2jPPs674VSj9JH9eYQz"
  }
}
Once that is in, runs of anchor run test will continue to work, against a
remote test validator. So far this is pretty cool!
The steps are therefore
solana config set --url http://10.3.141.135:8899
anchor build
anchor run deploy
# patch up program id in IDL
anchor run test
This isn’t perfect, but it works already without much hassle. I hope to update this post with simpler steps and less workarounds soon!
Use a remote validator as localhost with an SSH tunnel
I’d recommend against running a test validator on the open internet. As we cannot easily add authentication, you can set up an SSH tunnel to localhost and all Solana tools will work out of the box. We have to tunnel both the RPC and the WebSocket port:
ssh -L 8899:10.3.141.135:8899 -L 8900:10.3.141.135:8900 -N noxim@10.3.141.135
And point your Solana toolchain back to localhost:
solana config set --url http://localhost:8899
Config File: /Users/noxim/.config/solana/cli/config.yml
RPC URL: http://localhost:8899
WebSocket URL: ws://localhost:8900/ (computed)
Keypair Path: /Users/noxim/.config/solana/id.json
Commitment: confirmed
See also the snippet summaries on Ubuntu servers:
Published on Wednesday, Dec 29, 2021. Last modified on Monday, Sep 11, 2023.
Go back